Showing posts with label cosmetics. Show all posts

Saturday, July 26, 2014

Winged Eyeliner with Rimmel Scandaleyes Micro Eyeliner

Disclaimer: I received this product free as a reward for participation in reviewing other Rimmel items with Influenster. All opinions are my own.

I'm a sucker for a good liquid eyeliner. However, it can be easy to find some really bad liquid eyeliners, but this one right here definitely falls into the good category. 

It's in a marker form, which means it's easy to control, no pot to constantly dip into, or if you're unlucky, knock over. The tiny tip makes it super easy to make your line as thick or think as you would like. Want to draw on funky designs? No problem. It's so precise that doing extra fun flicks and tricks is a breeze.


In this one you can see how easy it is to get super close to the lash line and draw a nice, smooth line.


As far as something more dramatic goes you can see how easily you can do something a bit more, like this feathered look. 

Learn more about it on Rimmel's site here. 

Monday, November 25, 2013

Rimmel Scandaleyes Retro Glam Mascara Review and Photos

I was lucky enough to receive this mascara compliments of Influenster in their recent Rose Vox Box. I wanted to recap my experiences in it as well as show it off in a few lights while wearing some makeup that nods to the mod feel of this line.


At first glance I was terrified of the huge brush, as I do favor smaller brushes, but I was pleasantly surprised. This still separated quite nicely without clumping or getting mascara all over my eyelids.


It's really simple to pull off the mod winged eyeliner in a very wearable fashion, especially when the rest of your makeup stays neutral.

I ALWAYS curl my eyelashes before applying mascara, it takes hardly any time and it really gives the lashes some extra oomph.

This mascara will be hitting shelves this month, I have already spotted it popping up in stores near me.


I have very short lashes and I absolutely love the length that this gives in just one coat. Yes, I am only wearing one quick coat of mascara in these photos. That's where that large brush pays off!

You absolutely can wear another coat of this, but because it does have such great pay off, I suggest using a lash comb or spare mascara brush (they have them at places like Target for $1!) to comb through before the second coat to ensure no clumps.


Most days I wear glasses instead of contacts and you do not have to worry about losing your eyes behind your frames, the long, thick look that you achieve with this mascara still makes your eyes pop.

My favorite thing about this mascara is how quick it is to get long, full lashes. No need to build it up, just curl, swipe, and go!

Again, I received this product courtesy of Influenster for testing purposes. All opinions are my own.

Want to join the fun? Let me know and I'll send you an invitation.


Tuesday, November 5, 2013

Rimmel London Stay Matte Liquid Mousse Foundation Review

I was recently lucky enough to receive the Rimmel London Stay Matte foundation compliments of Influnster to test and review. Short review: This stuff is awesome, go buy it. If you'd like a little bit more detail, please read on and check out the photos. I also do need to note that this product is not on the market in the US yet, but it will be very soon!


 As you can see this foundation comes in a handy tube, which I really prefer. It's lightweight and easy to squeeze onto my brush. My foundation brush of choice is the Real Techniques Expert Face Brush. Mixed with this foundation the two create a soft, light coverage that still handles any imperfections beautifully. It feels very breathable and not once has it gotten flaky or chalky on my face. My face stays nice and shine free for about 8 hours before I might get some break through shine, but it's nothing a quick blot with some blotting papers can't fix. In the following photo I have JUST the Rimmel London Stay Matte foundation on half of my face, no concealer, no powder, nothing. It covers the redness and blotchiness of my skin without settling into any lines or pores.


 I'm not sure what the price will be on this foundation when it launches, but I'm sure it will be in the same range as their others, which are very affordable. A little goes a long way with this foundation, especially using the brush. I was concerned about the color of the foundation, especially since Influenster chose it for me, but it blends perfectly. As noted in the photo I am shade 103 Light Ivory. I could probably wear a shade lighter and still have it blend nicely, so there seems to be a lot of wiggle room. Overall, this foundation has great staying power, covers beautifully without feeling heavy, and is definitely something I would purchase again.


Saturday, October 26, 2013

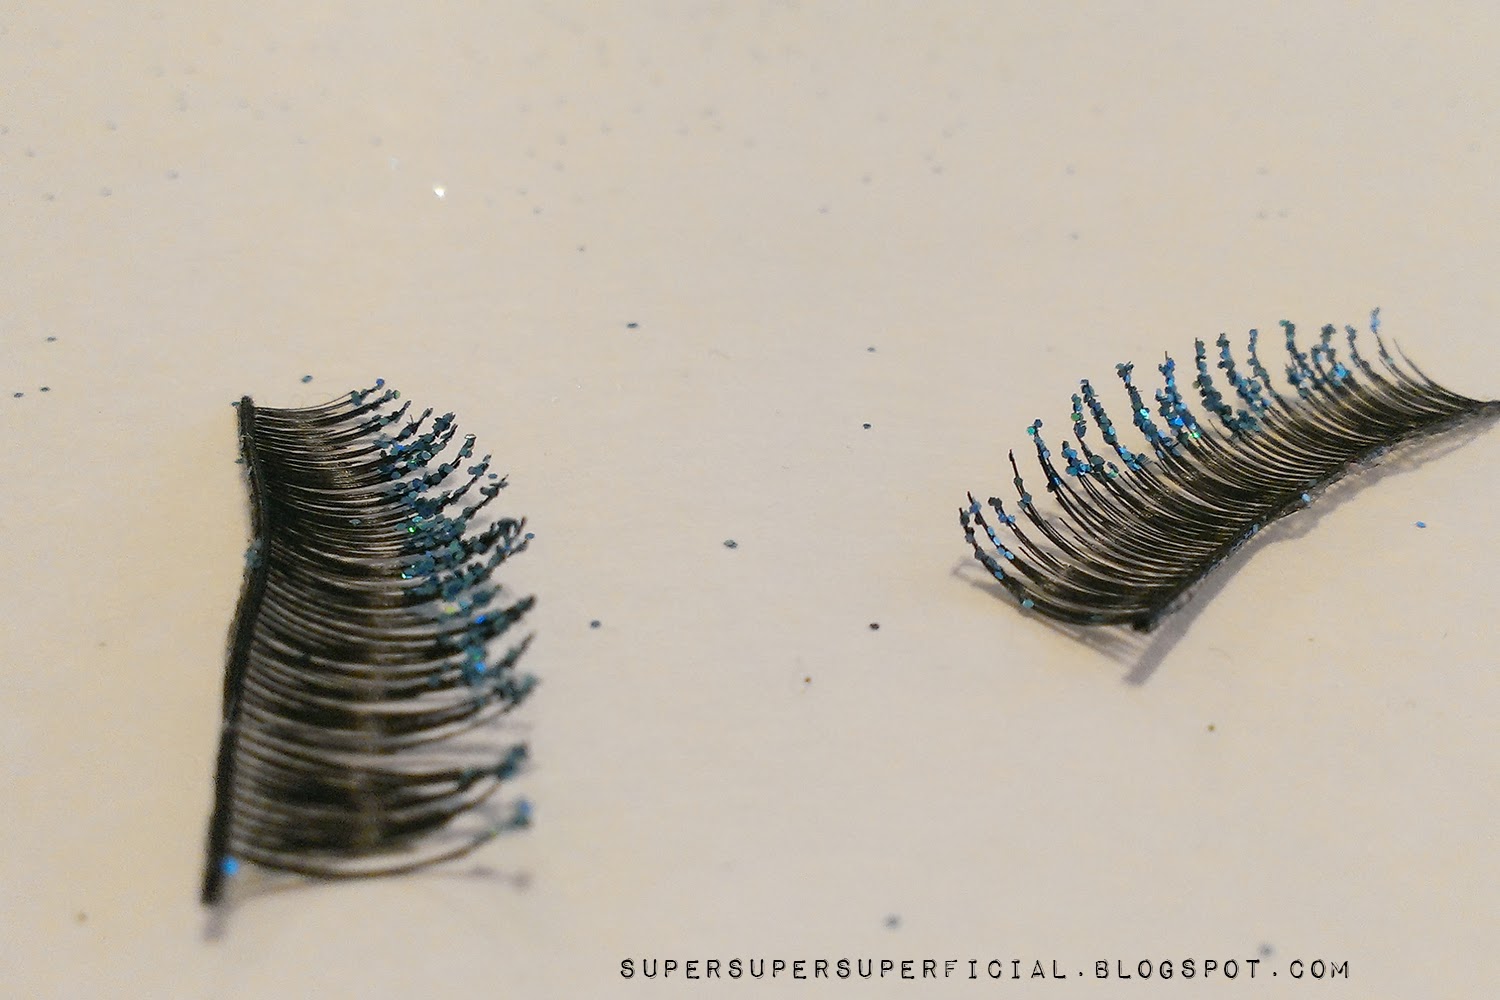
DIY Glitter Eyelashes

I love false eyelashes. I don't wear them regularly or for long periods of time, but I love them. I enjoy taking photos and having a fun pair of lashes can really pull together a look. Glitter eyelashes are everywhere, and super pretty, but can also get pricy at anywhere from $5 to $25 on up. I'm cheap and I'm crafty, so I decided to find a way to have glitter eyelashes and also have the option to remove the glitter and try another look. For this brief how to I'm using elf lashes (that come with glue, bonus) that are only $1 and some craft glitter. A note on the craft glitter, if you plan on wearing these for an extended period of time, it is probably best to use makeup safe glitter, should some get in your eye.
For those familiar with false eyelashes and the glue you know that you can wash it off, well that concept comes in handy when using the lash glue itself to adhere the glitter to the tips. I decided to use this teal-ish color for an upcoming mermaid look I'm going to do. This method can be used with glitter, rhinestones, glimmer powders, and even larger glitter accents. First, I removed the lashes and used the side of the plastic to stick them to so that the tips would be free.
This makes it simple to do them both at once. I simply ran the lash glue across the tips of both lashes and then immediately sprinkled glitter over them and shook it off.
It's really that simple. I let mine dry for a while before I use them. Want to wash them for another look? Just use some gentle soap or shampoo and water and gently scrub them and let them sit out on a wash cloth or paper towel to dry and then start all over again. I've done this with these pairs four or five times and there is no breakdown. Look for the mermaid look with these lashes later this evening or tomorrow.